出力されるHTMLデータの元となるファイルです。
Jartyで記述されています。
※ファイルはUTF-8(BOMなし)で保存してください!
Unicode以外で保存すると、Janetterの起動に失敗することがあります
ファイル構成
Theme
├─Common
│ ├──template
│ ├… ├─tweet.tpl
│
└─Items
├──(UserTheme)
├… ├──template
├… ├─tweet.tpl 【優先】
├…
└theme.ini
通常は「\Theme\Common\template」以下のテンプレートファイルが使われます。
ユーザーテーマフォルダに「template」がある場合はそちらが読み込まれます。
テンプレート一覧
- contextmenu.tpl
- 右クリックメニュー(コンテキストメニュー)
- no_tweet.tpl
- Woops!! No Tweet!画面(ツイートが見つからない)
- tweet.tpl
- メイン画面タイムラインのツイート
- これを差し替える場合は、「\Common\template\tweet.css」もtemplateフォルダにコピーしておいた方がよいかも
- prof_tweet.tpl
- プロファイル画面タイムラインのツイート
- reply.tpl
- 会話内容を表示するで展開されるReplyツイート
- edit_replyto_tweet.tpl
- Reply入力時に表示される宛先ツイート
- unread_count.tpl
- メニューアイコンに表示される未読カウンタ
- profile.tpl
- プロフィール画面
- listbox.tpl
- プロフィール画面から「リストに追加」を実行した時に表示されるダイアログ
- userlist.tpl
- プロフィール画面のフォローしている・フォローされている、ユーザーテンプレート
- timeline.tpl
- タイムライン1カラム分のテンプレート
編集例
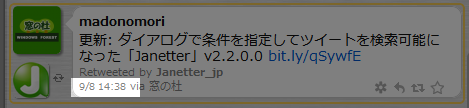
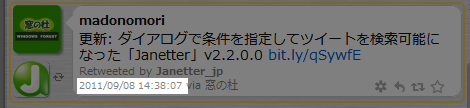
日時表示を「MM/DD hh:mm」から「YYYY/MM/DD hh:mm:ss」にする
tweet.tpl の日時に関係する部分を簡易表示から、年月日時分秒まで表示させるようにします。
{if $retweeted_status}{* RT *}
	<a href="https://twitter.com/{$retweeted_status.user.screen_name}/status/{$retweeted_status.id_str}"
	   title="{$retweeted_status.created_at|date_format:'%k'}">
		<span class="time"
		      created_at="{$retweeted_status.created_at|date_format:'%s'}">
			{$retweeted_status.created_at|date_format:'%K'}
		</span>
	</a>
{elseif $sender}{* DM *}
	<a class="no-link" title="{$created_at|date_format:'%k'}">
		<span class="time"
		      created_at="{$created_at|date_format:'%s'}">
			{$created_at|date_format:'%K'}
		</span>
	</a>
{else}{* Normal *}
	<a href="https://twitter.com/{if $user}{$user.screen_name}{else}{$from_user}{/if}/status/{$id_str}"
	   title="{$created_at|date_format:'%k'}">
		<span class="time"
		      created_at="{$created_at|date_format:'%s'}">
			{$created_at|date_format:'%K'}
		</span>
	</a>
{/if}
上のコードうち、
{$created_at|date_format:'%K'}と
{$retweeted_status.created_at|date_format:'%K'}の
date_format:'%K'をすべて
date_format:'%k'にします。
↓
これで簡易表示から、詳細表示にかえることができました。
これ以外の日付表示を試したいときは、
date_formatから得られる結果一覧も参考にしてください。
何曜日かを表示させる
{$created_at|date_format:'(%a)'|replace:"Sun":"日"|replace:"Mon":"月"|replace:"Tue":"火"|replace:"Wed":"水"|replace:"Thu":"木"|replace:"Fri":"金"|replace:"Sat":"土"}
多少、強引なやり方だが、簡易に実現できる。
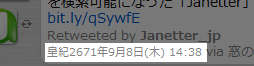
和暦表示にする
平成{math equation="y - 88" y=$created_at|date_format:'%y' }年 おまけ:皇紀表示にする
皇紀{math equation="y - 0 + 660" y=$created_at|date_format:'%Y' }年
{$created_at|date_format:'%q月%o日(%a) %R'|replace:"Sun":"日"|replace:"Mon":"月"|replace:"Tue":"火"|replace:"Wed":"水"|replace:"Thu":"木"|replace:"Fri":"金"|replace:"Sat":"土"}
ただし、数値計算を伴う処理はテンプレートでは無く、呼び出し元のJavascriptを書き換える方がよいかと思う。
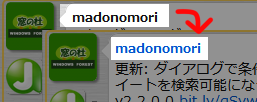
ユーザー名をクリックするとプロフィール画面を開くようにする
tweet.tpl 35,もしくは49行目付近
<span class="displayname">{$displayname}</span>
これを、次のように書き換えてみます
 <a action="user" screenname="{$main_user.screen_name}" >
  <span class="displayname" >{$displayname}</span>
 </a>
すこし分かりにくいですが、クリック一つでプロフィール画面を開けるようになりました。
後はCSSでリンクの色を調整するだけです。
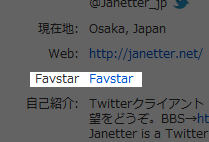
プロフィール画面に「Favstar」へのリンクをつくる
profile.tpl 77行目
<li>
	<dt transtext="profContentsWeb"></dt>
	<dd><a href="{$url}">{$url}</a></dd>
</li>
<!-- ↓ここを追加 -->
<li>
	<dt>Favstar</dt>
	<dd><a href="http://ja.favstar.fm/users/{$screen_name}">Favstar</a></dd>
</li>
<!-- ↑ここまで -->
これで「favstar」へのリンクを張ることができました。
参考:
profile.tplで使える変数一覧
プロフィール画面の背景を、対象ユーザーの背景画像に差し替える
profile.tpl 行頭
<style>body {ldelim} background-image:url({$profile_background_image_url}) {rdelim} </style>
「 { }」 (中括弧)でくくられた部分が構文解析されるのを回避するために、「{」を「
{ldelim}」に、「}」を「
{rdelim}」に置き換えます。
このままでは文字が見えにくくなる場合があるので、各自で調節していきましょう。
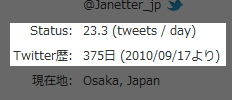
平均ツイート数、Twitter歴を表示させる
<li>
	<dt>Status:</dt>
	<dd >
{math equation="(t-s)/86400" s=$created_at|date_format:'%s' t=$jarty.now|date_format:'%s'  assign=Continuance }
{math equation="tw/day" tw=$statuses_count day=$Continuance  assign=Average }
	{$Average|regex_replace:"/^(\d*)(\.\d)(.*)$/":"$1$2"} (tweets / day)</dd>
</li>
<li>
	<dt>Twitter歴:</dt>
	<dd >
	{$Continuance|regex_replace:"/^(\d*)(\.\d)(.*)$/":"$1"}日({$created_at|date_format:'%L'}より)</dd>
</li>
※formatやstring_formatが使えないので、正規表現を使って小数点以下を切り捨てています
「assign=Continuance」で{$Continuance}に計算結果を代入するように命令します。
旧黄色TweetDeckのようにアイコン下にフォロワー数を表示させる
tweet.tplは、
{if $retweeted_status}{* RT *}
<p class="main-profile">
<a action="all"><img src="{$retweeted_status.user.profile_image_url}"></a>
{$main_user.followers_count}
</p> {elseif $user}{* Normal *}
<p class="main-profile">
<a action="all"><img src="{$user.profile_image_url}"></a>
{$main_user.followers_count}
</p>
として、prof_tweet.tplは、
{if $retweeted_status}{* RT *}
<p class="main-profile">
<a action="all"><img src="{$retweeted_status.user.profile_image_url}"></a>
{$main_user.followers_count}
</p> {else}{* Normal *}
<p class="main-profile">
<a action="all"><img src="{$main_user.profile_image_url}"></a>
{$main_user.followers_count}
</p>
とすれば良い。ただ{$main_user.followers_count}を追加するだけ。上から順に「TL上のリツイート」「TL上のツイート」「プロフィール上のリツイート」「プロフィール上のツイート」に対応している。
また、多少ゴチャゴチャするが、「リツイートされた人」だけでなく「リツイートした人」のフォロワー数表示も出来るし、やろうと思えばDMのカラムでもフォロワー数表示が出来る。上と同じように追加すればいいだけだが、<p class="sub-profile">とあったら{$sub_user.followers_count}を追加しなきゃいけない点に注意。
最終更新:2012年02月22日 10:47